Dedicated Server
Showing posts with label retrofit. Show all posts

How to fix "Expected a string but was BEGIN_OBJECT" in GSON

You might have come across a gson exception that says  "Expected a string but was BEGIN_OBJECT". This means that you are parsing the response as if it were a string, but actually it is a json object.

I would recommend you to check how to parse json in android if you have no prior knowledge in parsing json

Add these dependencies in your app's build.gradle file

compile 'com.squareup.retrofit2:retrofit:2.3.0'
compile 'com.squareup.retrofit2:converter-gson:2.3.0'

Suppose your response is a json object, something like the following

{ 
"username":"jon",
"email":"jon@email.com", 
"user_array": [
 { 
 "user_address":"jon",
 "user_location":"jon@email.com"
 }, {..},
 .
 . 
 ]
}

You will receive the error Expected a string but was BEGIN_OBJECT if you try to parse it like this
Retrofit retrofit = new Retrofit.Builder()
        .baseUrl("base_url")
        .addConverterFactory(GsonConverterFactory.create())
        .build();

RequestInterface request = retrofit.create(RequestInterface.class);
Call<String> call=request.getJson();
call.enqueue(new Callback<String>() {
    @Override    
    public void onResponse(Call<String> call, Response<String> response) {
        progressDialog.dismiss();
        String s= String.valueOf(response.get("username"));
        JsonArray user_array= response.getAsJsonArray("user_array");
        Toast.makeText(PrintTicket.this,response.toString(),Toast.LENGTH_SHORT).show();
    }

    @Override    
    public void onFailure(Call<String> call, Throwable t) {
        progressDialog.dismiss();
        Toast.makeText(PrintTicket.this,t.toString(),Toast.LENGTH_SHORT).show();
    }
});

GSON will throw the above mentioned error because you have used Call<Stringinstead of using Call<JsonObject> or  using a pojo class

Solution 1 : by using JsonObject:


Retrofit retrofit = new Retrofit.Builder()
        .baseUrl("base_url")
        .addConverterFactory(GsonConverterFactory.create())
        .build();

RequestInterface request = retrofit.create(RequestInterface.class);
Call<JsonObject> call=request.getJson();
call.enqueue(new Callback<JsonObject>() {
    @Override    
    public void onResponse(Call<JsonObject> call, Response<JsonObject> response) {
        progressDialog.dismiss();
        String s= String.valueOf(response.get("username"));
        JsonArray user_array= response.getAsJsonArray("user_array");
        Toast.makeText(PrintTicket.this,response.toString(),Toast.LENGTH_SHORT).show();
    }

    @Override    
    public void onFailure(Call<JsonObject> call, Throwable t) {
        progressDialog.dismiss();
        Toast.makeText(PrintTicket.this,t.toString(),Toast.LENGTH_SHORT).show();
    }
});

You can see that here we are expecting a JsonObject as response parameter instead of String. Now we can parse the response correctly as we are expecting the same format mentioned in the response. Also dont forget to change the response param in interface to Call<JsonObject> as shown below

RequestInterface.java
public interface RequestInterface {

@GET("api_endpoint")
Call<JsonObject> getJson();

}


Solution 2 : by using POJO class

First create a pojo class like this

Example.java
public class Example {

@SerializedName("username")
@Expose
private String username;
@SerializedName("email")
@Expose
private String email;
@SerializedName("user_array")
@Expose
private List<UserArray> userArray = null;

public String getUsername() {
return username;
}

public void setUsername(String username) {
this.username = username;
}

public String getEmail() {
return email;
}

public void setEmail(String email) {
this.email = email;
}

public List<UserArray> getUserArray() {
return userArray;
}

public void setUserArray(List<UserArray> userArray) {
this.userArray = userArray;
}

}

Then use it inside your retrofit call like this

Retrofit retrofit = new Retrofit.Builder()
        .baseUrl("base_url")
        .addConverterFactory(GsonConverterFactory.create())
        .build();

RequestInterface request = retrofit.create(RequestInterface.class);
Call<Example> call=request.getJson();
call.enqueue(new Callback<Example>() {
    @Override    
    public void onResponse(Call<Example> call, Response<Example> response) {
        progressDialog.dismiss();
        String user_name= response.getUsername();
        user_array= new ArrayList<>(response.getUserArray());
        Toast.makeText(PrintTicket.this,response.toString(),Toast.LENGTH_SHORT).show();
    }

    @Override    
    public void onFailure(Call<Example> call, Throwable t) {
        progressDialog.dismiss();
        Toast.makeText(PrintTicket.this,t.toString(),Toast.LENGTH_SHORT).show();
    }
});

RequestInterface.java
public interface RequestInterface {
@GET("api_endpoint")
Call<Example> getJson();
}

You can use Call<String> as response param only if your response is not enclosed in curly brackets. In this case the response will be a plain text

How to convert any blogger blog into a native android app ?

A lot of bloggers would like to convert Blogger blog into native android app. Of course we could view our blog in a mobile web browser if we setup a mobile responsive template, but what if we have to customise our blog's look and feel? What if we have to support additional native features like share to whatsapp ?

We may also make use of a WebView to just load the webpage inside the app, but this provides less chances of customisation, or we may make use of any hybrid app platform to convert blogger blog into native android app.

In fact we have access to some of the blog contents in the form of json apis. You could check here for more details. You could then club the blogger functionalities with other native android features as well.


In this tutorial let us try to make a simple native android app which helps us to view our blog posts in a customised layout.

Logging in Retrofit 2 using okhttp

RETROFIT allows integration of a lot of add on libraries like converters, libraries for other network operations etc. One such library is the OKHTTP library. OKHTTP is one efficient library when it comes to handling network operations. It can easily be attached to retrofit. Hence even if retrofit doesn't allow any default methods for logging, we can add an okhttp client enabled with logging to the retrofit instance to support logging.

Add this dependency in your app's build.gradle file

compile 'com.squareup.okhttp3:logging-interceptor:3.9.1'


Now you need to create an instance of the logging interceptor like this

HttpLoggingInterceptor interceptor = new HttpLoggingInterceptor(); interceptor.setLevel(HttpLoggingInterceptor.Level.BASIC);

you may set the log level**  as NONE,BASIC,HEADERS,BODY

Now create an okhttp client instance and then add this interceptor to it

OkHttpClient.Builder httpClient = new OkHttpClient.Builder();
httpClient.addInterceptor(interceptor);
Now set the httpClient to your retrofit instance like this

Retrofit retrofit = new Retrofit.Builder()
        .baseUrl("base_url")
        .client(httpClient.build())
        .build();

now run the app and check your logcat to see log messages like shown below


The setLevel method is used for setting the level of log i.e,

HttpLoggingInterceptor.Level.NONE - No logs will be produced(ideal for production environments)

HttpLoggingInterceptor.Level.BASIC - Logs request and response lines.example :
--> POST /greeting http/1.1 (3-byte body)** <-- 200 OK (22ms, 6-byte body)
HttpLoggingInterceptor.Level.HEADERS - Logs request and response lines and their respective headers.
example :

 --> POST /greeting http/1.1* Host: example.com* Content-Type: plain/text* Content-Length: 3* --> END POST** <-- 200 OK (22ms)* Content-Type: plain/text* Content-Length: 6* <-- END HTTP

HttpLoggingInterceptor.Level.BODY - Logs request and response lines and their respective headers and bodies (if present)example :
 --> POST /greeting http/1.1* Host: example.com* Content-Type: plain/text* Content-Length: 3** Hi?* --> END POST** <-- 200 OK (22ms)* Content-Type: plain/text* Content-Length: 6** Hello!* <-- END HTTP

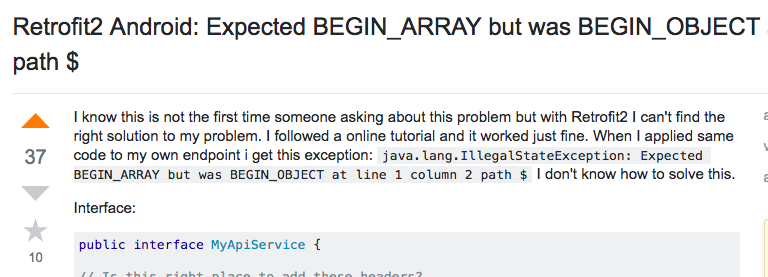
How to fix "expected begin_array but was begin_object" in Retrofit ?


Before we begin, keep this in mind

begin_array means the json response is an array which will look something like this [{},{},..]
begin_object means the json response is an object which will look something like this {....}

gson is one cool library that will provide us with cool tips in the form of errors while handling json responses. One such tip is "expected begin_array but was begin_object". These tips/errors are quite self explanatory, we can now look deeper into these errors.

While handling responses using retrofit, we often tend to come across an error "expected begin_array but was begin_object", which is thrown by gson. Obviously this means that we are trying to parse the response as if it is a json array response but when actually it is a json object response. But still we come across these errors a lot of time. We will be looking in detail about such situations in this post.


First add the following dependencies in your app's build.gradle file

compile 'com.squareup.retrofit2:retrofit:2.3.0'
compile 'com.squareup.retrofit2:converter-gson:2.3.0'

PARSING JSON OBJECT RESPONSES : 

  • json object  response is of the form {....}.  The json object may also contain a json array like the below example where the json object contains a json array named user_array.
{ 
"username":"jon",
"email":"jon@email.com", 
"user_array": [
 { 
 "user_address":"jon",
 "user_location":"jon@email.com"
 }, {..},
 .
 . 
 ]
}


In order to parse the above json object you can either use the JsonObject from gson or create pojo classes


1. Parsing using JsonObject  from gson


Retrofit retrofit = new Retrofit.Builder() .baseUrl("base_url") .addConverterFactory(GsonConverterFactory.create()) .build(); RequestInterface request = retrofit.create(RequestInterface.class); Call<JsonObject> call=request.getJson(); call.enqueue(new Callback<JsonObject>() { @Override public void onResponse(Call<JsonObject> call, Response<JsonObject> response) { progressDialog.dismiss(); String s= String.valueOf(response.get("username")); JsonArray user_array= response.getAsJsonArray("user_array"); Toast.makeText(PrintTicket.this,response.toString(),Toast.LENGTH_SHORT).show(); } @Override public void onFailure(Call<JsonObject> call, Throwable t) { progressDialog.dismiss(); Toast.makeText(PrintTicket.this,t.toString(),Toast.LENGTH_SHORT).show(); } });
RequestInterface.java
public interface RequestInterface { @GET("api_endpoint") Call<JsonObject> getJson(); }

2. Parsing using POJO  class

You can automatically generate the pojo classes by pasting your json response structure in http://www.jsonschema2pojo.org/ .

FYI : after pasting the response structure in http://www.jsonschema2pojo.org/ ,  set the source type to JSON and Annotation style to Gson , now click preview button and you can see generated pojo class/classes

For the above case you will need to generate two classes like below

Example.java

public class Example {

@SerializedName("username")
@Expose
private String username;
@SerializedName("email")
@Expose
private String email;
@SerializedName("user_array")
@Expose
private List<UserArray> userArray = null;

public String getUsername() {
return username;
}

public void setUsername(String username) {
this.username = username;
}

public String getEmail() {
return email;
}

public void setEmail(String email) {
this.email = email;
}

public List<UserArray> getUserArray() {
return userArray;
}

public void setUserArray(List<UserArray> userArray) {
this.userArray = userArray;
}

}

UserArray.java

public class UserArray {

@SerializedName("user_address")
@Expose
private String userAddress;
@SerializedName("user_location")
@Expose
private String userLocation;

public String getUserAddress() {
return userAddress;
}

public void setUserAddress(String userAddress) {
this.userAddress = userAddress;
}

public String getUserLocation() {
return userLocation;
}

public void setUserLocation(String userLocation) {
this.userLocation = userLocation;
}

}

In the above  pojo classes, we have used @SerializedName annotation which will help us to map the class variables to respective keys in the response json. For example, in UserArray.java, the string variable userAddress is correctly mapped to user_address by using the @SerializedName annotation like this

@SerializedName("user_address")
@Expose
private String userAddress;


The Example.java is for parsing the outer json object whereas UserArray.java is for parsing the inner json object which should be parsed as a list(since there is a list of objects in user_array)


Now the retrofit call should be made like the following

ArrayList<RouteStop> user_array;
Retrofit retrofit = new Retrofit.Builder()
        .baseUrl("base_url")
        .addConverterFactory(GsonConverterFactory.create())
        .build();

RequestInterface request = retrofit.create(RequestInterface.class);
Call<Example> call=request.getJson();
call.enqueue(new Callback<Example>() {
    @Override    
    public void onResponse(Call<Example> call, Response<Example> response) {
        progressDialog.dismiss();
        String user_name= response.getUsername();
        user_array= new ArrayList<>(response.getUserArray());
        Toast.makeText(PrintTicket.this,response.toString(),Toast.LENGTH_SHORT).show();
    }

    @Override    
    public void onFailure(Call<Example> call, Throwable t) {
        progressDialog.dismiss();
        Toast.makeText(PrintTicket.this,t.toString(),Toast.LENGTH_SHORT).show();
    }
});

RequestInterface.java
public interface RequestInterface {
@GET("api_endpoint")
Call<Example> getJson();
}

The error "expected begin_array but was begin_object" occurs  if you are trying to parse the above response using Call<List<Example>> call=request.getJson(); because by using <List<Example>> we are clearly making an array request but we need to make an object request since response is of the form {..}

Similarly we get the error "expected begin_object but was begin_array when we are trying to make an object request were the response is of the form [{},{},..], which is a json array example. In such case we should make the call like Call<List<Example>>

Please check this tutorial to parse json array and display it in a recyclerview. Also free source code download is avalaible.

You may also check similar issues in StackOverflow


You may also check the following video that shows how to parse a json response using retrofit 2

How to use custom gson converter to parse dynamically changing json with Retrofit 2, Android


We often come across situations where our json response contains attributes that switches its type dynamically. For example , if a particular key returns JSONObject usually, but in some errror conditions it returns just an error message which is a String. In such cases, if we have configured our network callbacks to return a JSONObject then when a String is returned for error case, the network method callbacks may not be able to handle the response. In such cases we will have to perform dynamic json parsing. For such cases, you may use JsonDeserializer to intercept the response and convert it to appropriate type(using gson) even before it reaches the network method callbacks(onResponse,onFailure in case of retrofit).


Consider the following json structure in which the key responseMessage dynamically changes between a String and a JSONObject


{
"applicationType":"1",
"responseMessage":{
"surname":"Jhon",
"forename":" taylor",
"dob":"17081990",
"refNo":"3394909238490F",
"result":"Received"
}
}


{
       "applicationType":"4",
       "responseMessage":"Success"          
 }

Let us now see how to implement a custom gson converter to dynamically parse this response.

In the above cases we may create a model class like this


 1
 2
 3
 4
 5
 6
 7
 8
 9
10
11
12
13
14
15
16
17
18
19
20
21
22
23
24
25
26
public class ResponseWrapper {

    @SerializedName("applicationType")
    @Expose
    private String applicationType;
    @SerializedName("responseMessage")
    @Expose
    private ResponseMessage responseMessage;

    public String getApplicationType() {
        return applicationType;
    }

    public void setApplicationType(String applicationType) {
        this.applicationType = applicationType;
    }

    public ResponseMessage getResponseMessage() {
        return responseMessage;
    }

    public void setResponseMessage(ResponseMessage responseMessage) {
        this.responseMessage = responseMessage;
    }

}
where ResponseMessage will be an inner object for the json object with the same name

But this will work only when ResponseMessage is a JSONObject(the first json) but what happens if the response dynamically switches between a JSONObject and String??

One solution is that we could use  gson-converter

Dependencies/Libraries to be used :

  1. compile 'com.squareup.retrofit2:retrofit:2.3.0'
  2. compile 'com.squareup.retrofit2:converter-gson:2.3.0'

First of all you will need three model classes like the following


ResponseWrapper


 1
 2
 3
 4
 5
 6
 7
 8
 9
10
11
12
13
14
15
16
17
18
19
20
21
22
23
24
25
26
public class ResponseWrapper {

    @SerializedName("applicationType")
    @Expose
    private String applicationType;
    @SerializedName("responseMessage")
    @Expose
    private Object responseMessage;

    public String getApplicationType() {
        return applicationType;
    }

    public void setApplicationType(String applicationType) {
        this.applicationType = applicationType;
    }

    public Object getResponseMessage() {
        return responseMessage;
    }

    public void setResponseMessage(Object responseMessage) {
        this.responseMessage = responseMessage;
    }

}


ResponseMessage


 1
 2
 3
 4
 5
 6
 7
 8
 9
10
11
12
13
14
15
16
17
18
19
20
21
22
23
24
25
26
27
28
29
30
31
32
33
34
35
36
37
38
39
40
41
42
43
44
45
46
47
48
49
50
51
52
53
54
55
56
57
58
59
public class ResponseMessage extends ResponseWrapper {

@SerializedName("surname")
@Expose
private String surname;
@SerializedName("forename")
@Expose
private String forename;
@SerializedName("dob")
@Expose
private String dob;
@SerializedName("refNo")
@Expose
private String refNo;
@SerializedName("result")
@Expose
private String result;

public String getSurname() {
    return surname;
}

public void setSurname(String surname) {
    this.surname = surname;
}

public String getForename() {
    return forename;
}

public void setForename(String forename) {
    this.forename = forename;
}

public String getDob() {
    return dob;
}

public void setDob(String dob) {
    this.dob = dob;
}

public String getRefNo() {
    return refNo;
}

public void setRefNo(String refNo) {
    this.refNo = refNo;
}

public String getResult() {
    return result;
}

public void setResult(String result) {
    this.result = result;
}

}


ResponseString


1
public class ResponseString extends ResponseWrapper { }

Here we have subclassed ResponseMessage, ResponseString from ResponseWrapper. The reason for this approach is that deserialize() method defined in UserResponseDeserializer have a return type of ResponseWrapper, so either of the subclassed classes can be returned from deserialize() depending on the response is an object/string

So implement a custom gson converter as shown below

UserResponseDeserializer(custom deserialiser)

 1
 2
 3
 4
 5
 6
 7
 8
 9
10
11
12
13
public class UserResponseDeserializer implements JsonDeserializer<ResponseWrapper> {
@Override
public ResponseWrapper deserialize(JsonElement json, Type typeOfT, JsonDeserializationContext context) throws JsonParseException {


        if (((JsonObject) json).get("responseMessage") instanceof JsonObject){
            return new Gson().fromJson(json, ResponseMessage.class);
        } else {
            return new Gson().fromJson(json, ResponseString.class);
        }

}
}

The deserialize() method is an overridden method that provides us with the json to be parsed. Here we can check the type of the json(json object/string) using instanceof method and decide whether to return ResponseMessage.class/ResponseString.class


Now pass the above UserResponseDeserializer to our GsonConverterFactory to  complete the implementation of our custom gson converter as shown below

Retrofit 2.0 Implementation

 1
 2
 3
 4
 5
 6
 7
 8
 9
10
11
12
13
14
15
16
17
18
19
20
21
22
23
Gson userDeserializer = new GsonBuilder().setLenient().registerTypeAdapter(ResponseWrapper.class, new UserResponseDeserializer()).create();


    Retrofit retrofit = new Retrofit.Builder()
            .baseUrl("base_url")
            .addConverterFactory(GsonConverterFactory.create(userDeserializer))
            .build();


    UserService request = retrofit.create(UserService.class);
    Call<ResponseWrapper> call1=request.listAllUsers();

    call1.enqueue(new Callback<ResponseWrapper>() {
        @Override
        public void onResponse(Call<ResponseWrapper> call, Response<ResponseWrapper> response) {
            ResponseWrapper responseWrapper=response.body();
            Log.i("DYNAMIC RESPONSE", String.valueOf(response.body().getResponseMessage()));
        }

        @Override
        public void onFailure(Call<ResponseWrapper> call, Throwable t) {
        }
    });

Thats it! you can now parse a json key which dynamically switches as a json object/string. Similar procedures can be followed for json arrays as well(just check instanceof JsonArray)

You may also check this example which provides free source code download